For an amazing tutorial click here http://www.photoshopcafe.com/tutorials/HDR_ps/hdr-ps.htm.
Here is my version- Let's begin!
Select a scene that has a high contrast in value- typically found in direct lighting. Bracketing ensures that you have a shot balanced for the highlights, one for the mediums, and the last for the darks.
You will need to begin with a bracketed set of exposures. You can set your camera to auto bracket (AEB +/- , which stands for auto exposure bracket). I recommend setting it 1-2 full stops (depending on the level of contrast).
To bracket manually simply find your balanced exposure, snap a shot then overexpose by one or two stops, snap, and then underexpose by one or two stops and snap. The photos will need to be EXACTLY the same frame- I recommend using a tripod if your camera doesn't have the swiftness of the AEB function. Hold still if you are using this function!
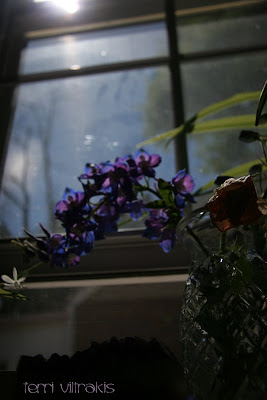
Exposed for the shadows
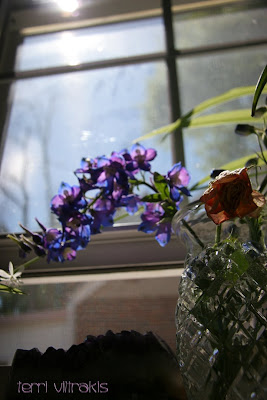
 Exposed for the highlights
Exposed for the mid tones
Next- open all three exposures in Photoshop.
Click on File> Automate>merge to HDR.
Add open files button and click OK...
Here you can play with your histogram settings to achieve the results you want. Be careful not to blow out the highlights- there are other steps you will follow to affect your results. You arent done with this yet!
After merging to HDR- set your histogram so that the highlights aren't blown out and hit OK. You will see an unflattering dark image.
**If you want to finish editing now you can skip ahead to the convert to 16 bits step or you can get a lot more versatility by following the instructions on Photomatix tone mapping here:
-You can download additional software http://www.hdrsoft.com/download.html called Photomatix tone mapping. This allows you to control many more aspects of the image from luminosity to saturation of the shadows, mids, and highlights. There is a free trial available at the link above.
Load it into your filters menu.
Go to your filters menu- click Photomatix and then tone mapping.
A screen with many sliders will pop up and you will be capable of adjusting color saturation, contrasts, shadows, mid tones, and highlights, etc. You need to develop an eye for keeping the photo real and yet still impressive. If you over-do HDR it will look totally faked. You want it on the verge of reality (to the max without crossing a line).
**Regardless of whether or not you have use the Photomatix tone mapping or not,
You will need to convert your image back to 16 bits. This will give you greater versatility in changing the finished results.
Go to Image> mode> 16 bits.
When you do this you will get to make a final set of adjustments in exposure and gamma. Those sliders are a bit too extreme for me, I like to adjust the tonal curve by clicking the drop-down menu next to method, selecting local adaptation, and adjusting the curve on the histogram so that I get the desired effect of color and contrast. Again, don't overdo it!!!

Here is the HDR version...
If you have older versions of Photoshop or even if you have Gimp (free photo editing software avb. at http://www.gimp.org/downloads/), you are still capable of achieving similar results.
The same instructions for this Gimp tutorial apply to older versions of Photoshop as they are close in what they do with slight variations on where to find the functions. Familiarize yourself with the settings!
For Gimp:
Use a tripod and be sure your photos are perfectly the same with no motion blur or the result will look blurry! See above for how to bracket.
http://www.instructables.com/id/HDR-photos-with-the-GIMP/


1 comment:
Just posted on my blog HDR tutorial: Create HDR photos with free software. Qtpfsgui and GIMP can give you more impressive results than commercial HDR apps.
Post a Comment